Now that you have a basic understand on what are the parameters you can vary and an idea on what type of outcome you are looking for by taking reference to some of the professional works, let’s jump start by examining a few recommended settings and see how you can tweak them to your own use.
The software tool I use is Cakewalk and I use the more complex Sonitus:compressor to compress my music. Cakewalk does come with an ordinary compressor too. I prefer the more complex one because there is flexibility for me to further fine tune certain parameters. Also, it comes with a compression curve graph that is handy in illustrating the compressor at work here in this article.
There are many tools out there that can do a similar job. Sony has one too. You may wish to download a trial version to see which one fits you best. If you are using an Apple machine, I think GarageBand does come with the compression tool.
Getting Started
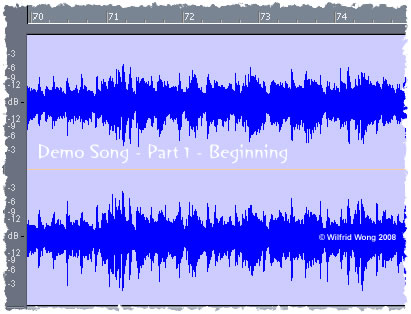
Before we dive into the various vintage compressor settings, as a basis for comparison, I have picked up one of our band’s recorded song as an illustration. We have recorded the vocals, lead guitar, rhythm guitar, bass guitar, and drums using 4 channels in a jamming studio environment and I have mixed them down to a stereo track. With the help of 3D panning as pre-sound processing work, I have attempted to balance the various tracks by bringing the vocals to the front while pushing the drums further to the back. However, much of the details are still overwhelmed by the dynamic range of the music.
I choose the song “My Little Swallow” as an illustration because it has a few variations in terms of instrument arrangement that can better showcase the compressor settings.
The song starts with a strumming of my Les Paul Deluxe guitar in clean sound (see below) and then the rest of the instruments join in.

Later on after the verses, it is my vocal throughout the bridge and the rest of the instruments that come in only at the beginning of each measure. Hence, there are lots of burst energy. Towards the end of the bridge, there is an accentuation of the drums and then all the instruments come back to live.
Towards where the chorus is, the wave looks “fatter” than above.

Compares the above to the reference waveforms in the previous section (such as the Muse’s live music), you should realize that there are much room for improvement. Now that the stage is set, it is time to see how different compressor settings affect the original waveform and ultimately the sound. Flip the page!
Do feel free to leave a comment at the main page.
| < Previous Page | Next Page > | |
